These tabs allow you to access different parts of the app.

These tabs allow you to access different parts of the app.
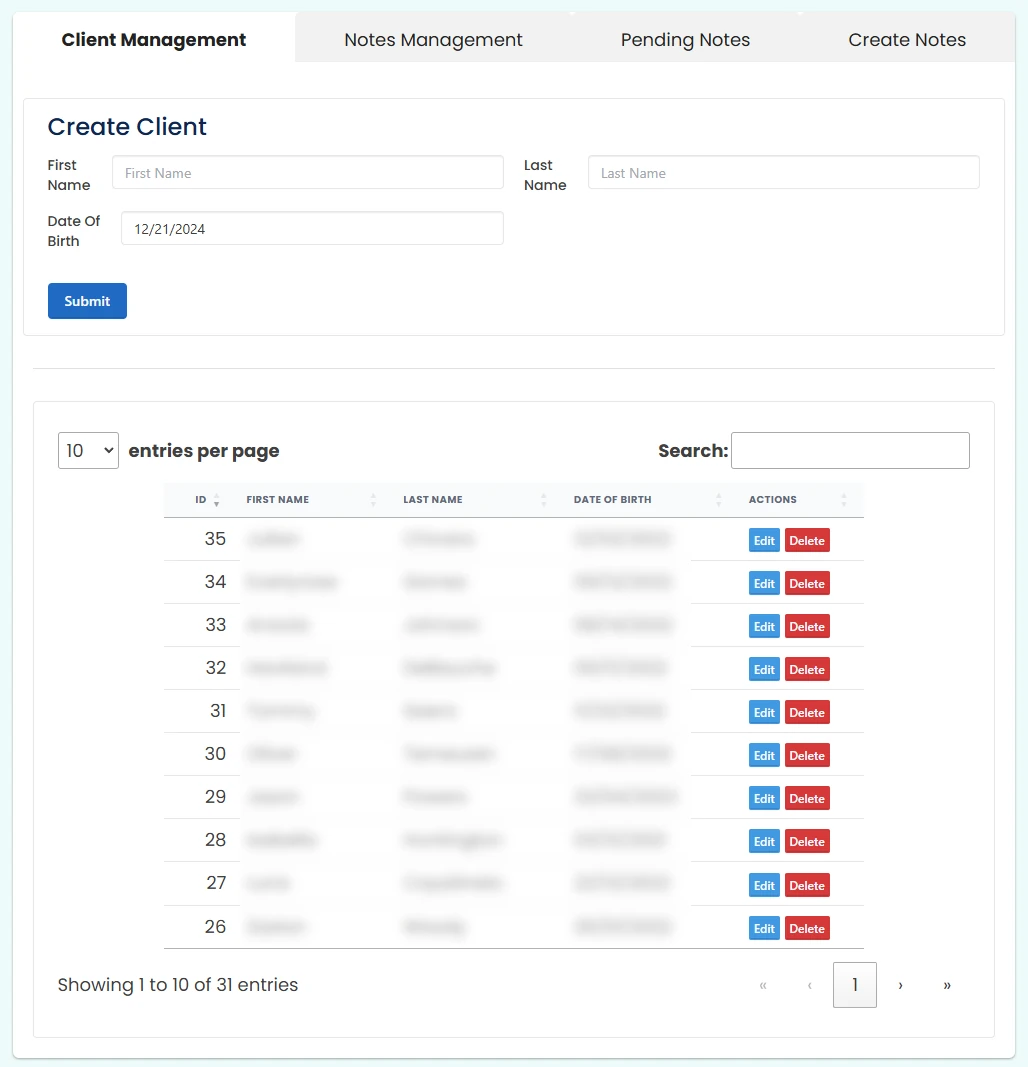
In this area you can create a new client. Fill in the First Name, Last Name, and Date of Birth, then click Submit.
This is where you can find all of your clients, use the search bar to search by name, date or other information.
The Client Management tab allows you to create, edit and delete clients.
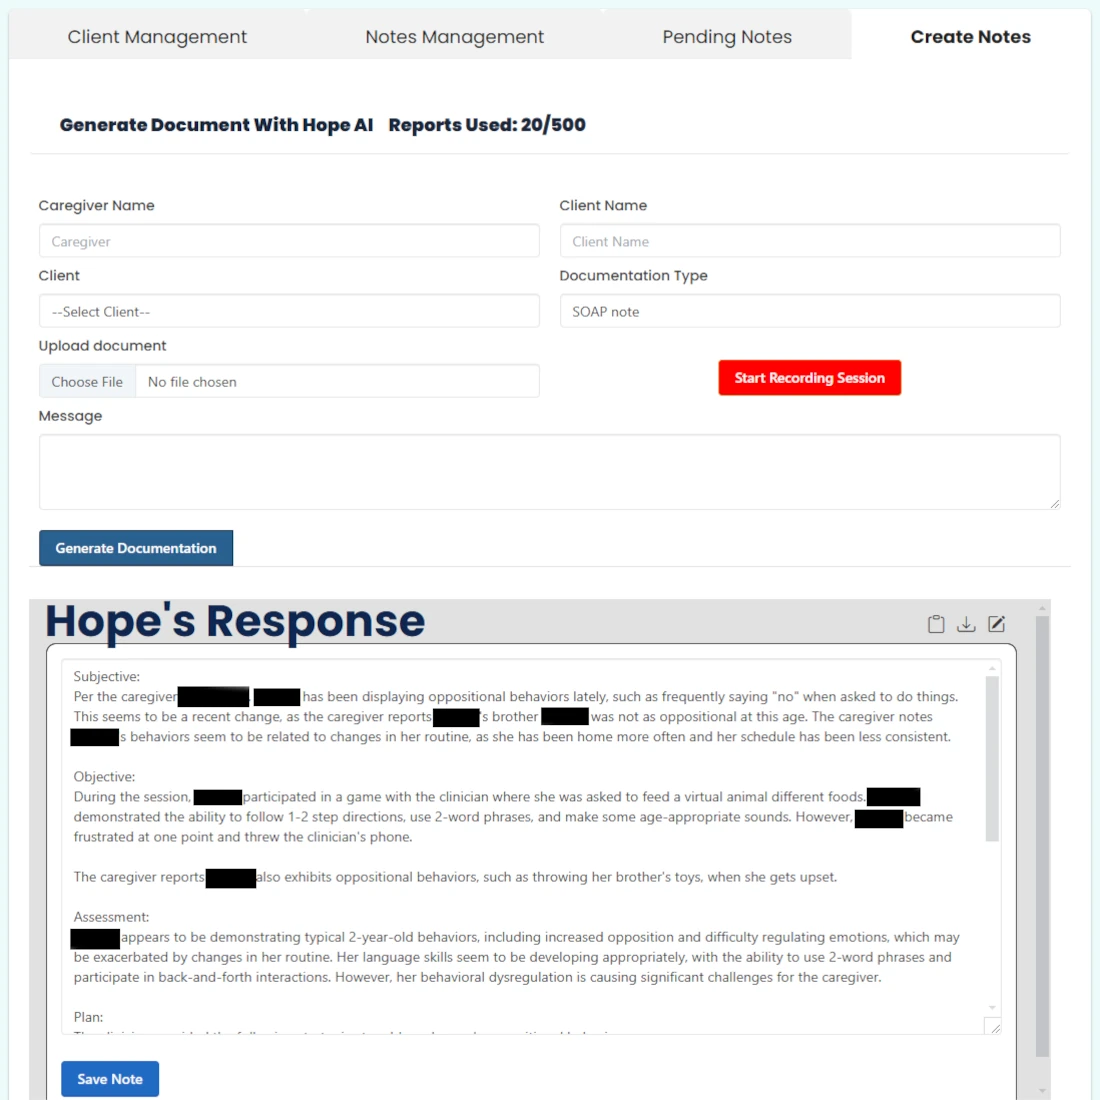
Enter the caregiver's name if you want the app to include discussions you had with the caregiver during the session.
The client's name will automatically be entered to ensure it is spelled correctly in the notes.
Select your client from the list of clients you've created in the Client Management tab
Choose your documentation type (SOAP note in this case)
Choose the file for your Zoom transcript
Use this button to start recording each session and stop recording at the end.
Please remember, it's important to stop the recording between sessions for good notes.
If you want to paste a transcript in instead of uploading it, you can.
Or if you want to write in some comments about the session, you can put them here.
A good example would be to explicitly state the percentage correct (or correct trials) of the goals you're working on.
Use this button to generate the SOAP note or the Progress Report from the transcript you chose.
In the Create Notes tab of the app, you can generate documentation from a Zoom transcript or use the built-in audio recording feature to let our app record your session and then create notes for you that will be placed in the Pending Notes tab.
In order to use the built-in recording feature, you just:
In order to use Zoom, you just:
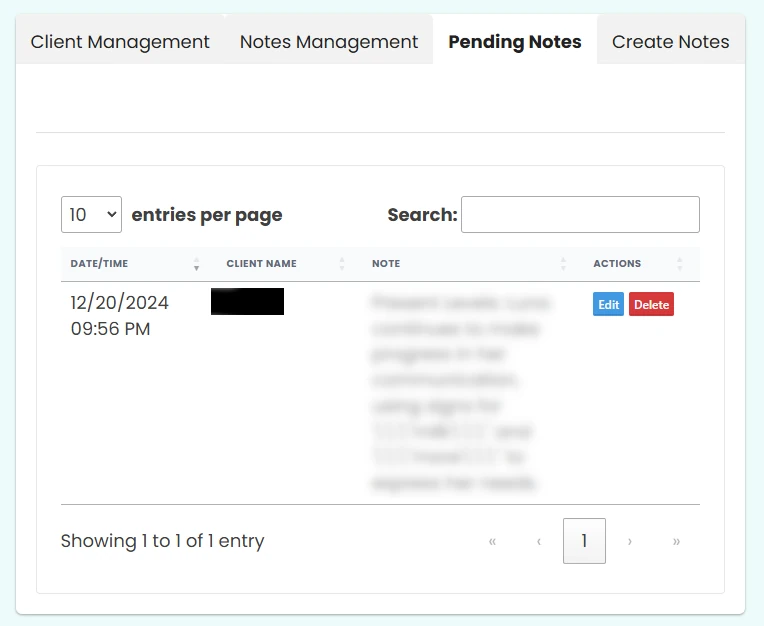
This tab is where you will find your pending notes after you use the built-in session recorder.
This tab will only appear if you have an In-Person subscription.
Here you can search your pending notes by name or other information found in the note.
Here you will find all of your pending notes. Once you edit them they will be removed from the Pending Notes tab and sent to the Notes Management tab.
Use the Edit button here to edit the note and then, once edited, you will finalize it and it will get sent to the Notes Management tab.
Only use the Delete button if you are sure you do not need the note anymore.
The Pending Notes tab will only appear if you have an In-Person subscription.
Pending Notes is where you will find the notes you recorded using our built-in session recorder. Here you will edit the notes and when you save them they will be transferred to your Notes Management area with the rest of your notes.
To do so:
Go to the next step below.
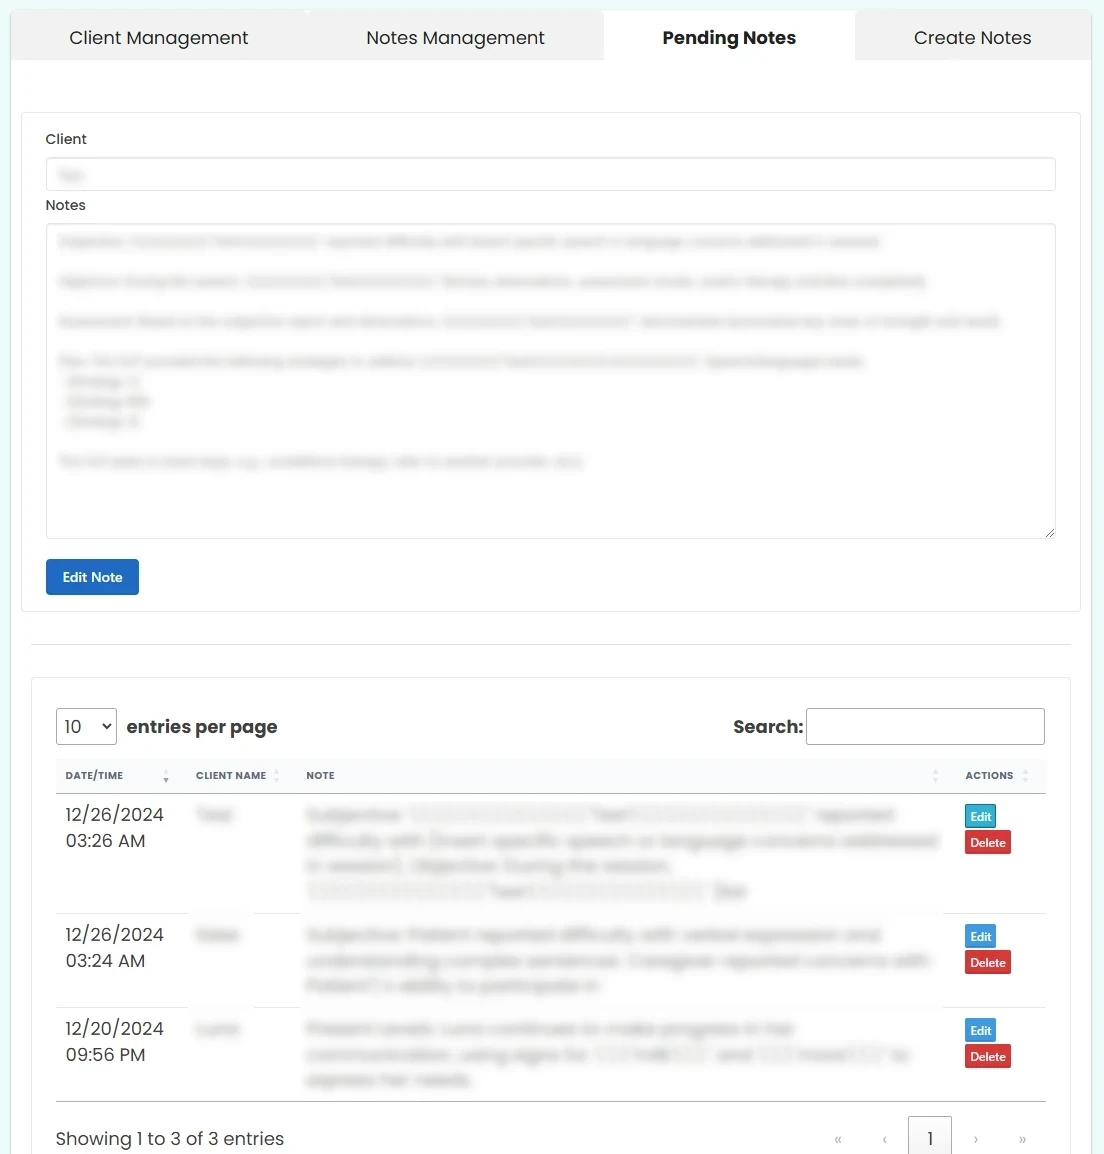
Your client's name will appear here.
In this box you can edit the note that was created. You can still edit it again later in the Notes Management tab, but it's often better to just do it here before you move it.
When you're done editing the note, just click this button and the note will be transferred to your Notes Management tab for later use.
All of your pending notes will be in this list, ready for you to edit them before they get sent to your Notes Management tab.
These are the buttons you use in order to edit or delete each note.
It is important to finalize the note you are already editing before trying to edit or delete a new note or the changes may be lost.
Yes, just like you, I am up until all hours doing my documentation, thankfully this app cuts my required documentation time by around 90%!
After you click the Edit Note button, you will get an edit box where you can edit the notes and then save them.
To do so:
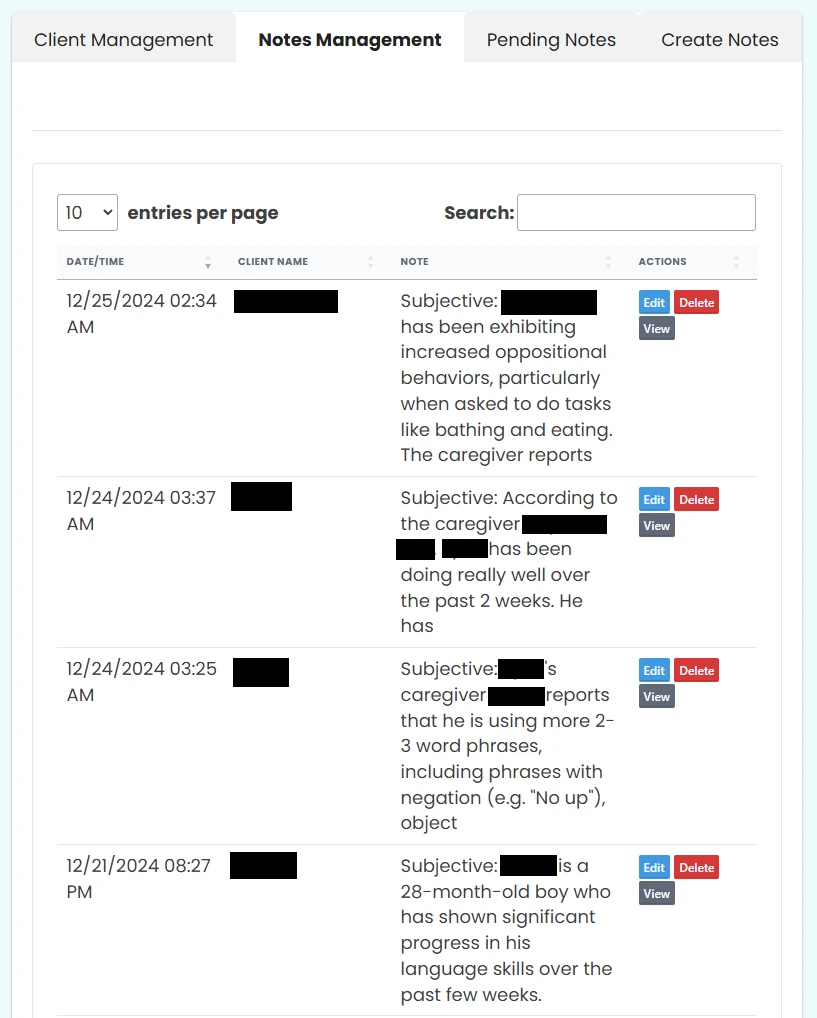
The Notes Management tab is where you will find all of your notes. You can search through them, edit them, view them or delete them in this area.